Godo Property users can create and manage Property Products or services that are available at the property. These products can be booked by travel agencies directly in Travia.
Products can be connected to a room, added as mandatory charges, or created as stand-alone products.
Navigate to Property Products.
-To create a new product, click Create new product.
-If you have multiple properties in Travia and want to add the same product to all properties, use generic product.

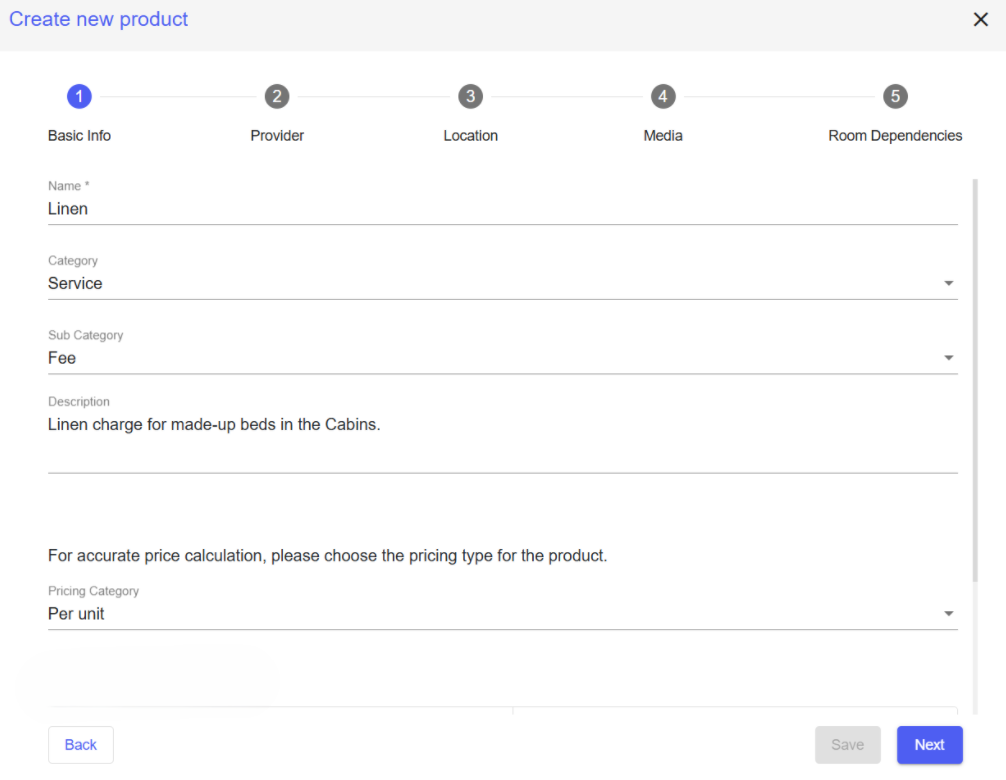
1. Fill in the Basic Info about the product.
- Name - for example: Linen, Spa access, Cleaning fee.
- Category - choose the category that best describes the product.
- Sub Category - this gives more detail about the type of product. The available sub categories depend on the main category you selected.
- Description - use this field to explain what is included in the product or service.
- Pricing Category - choose how the product should be priced.
2. When you have finished adding the basic information, click Next.
If your product or service should only be available on specific dates or at specific times, Travia Support team can enable time and date dependency for your property. To request access, contact support@travia.is.
For more information, see Property Products - time and date dependent.
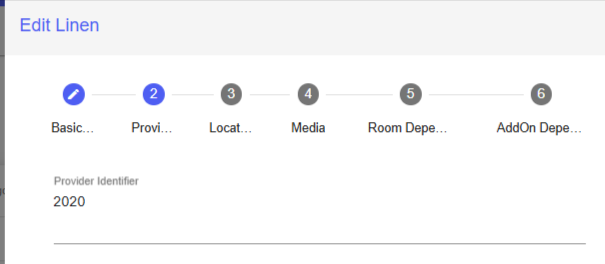
3. You can connect the product in Travia to the correct product or charge item by adding a Provider Identifier.
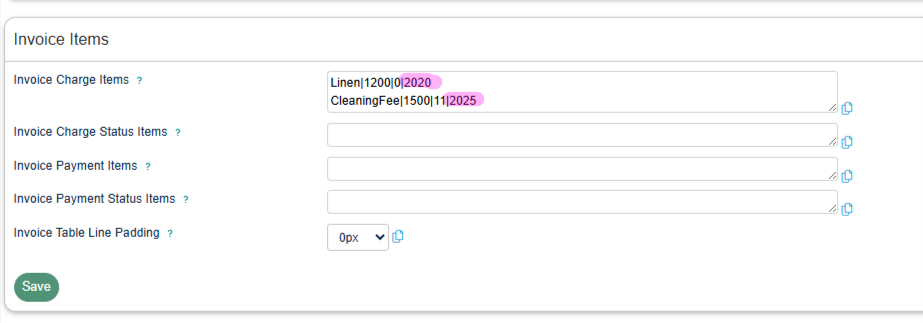
It is the product ID used for accounting purposes. This helps make sure the correct product, service, or charge is used when information is sent between Travia and the external system. For Godo Property, the Provider Identifier is the product number found under Invoice Charge Items.
Screenshot from Godo Property:
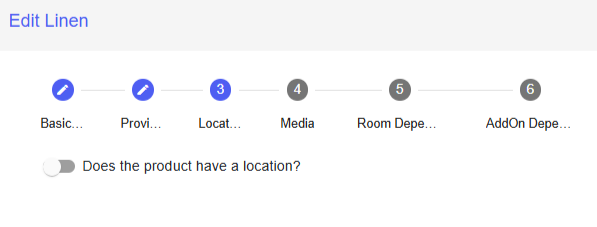
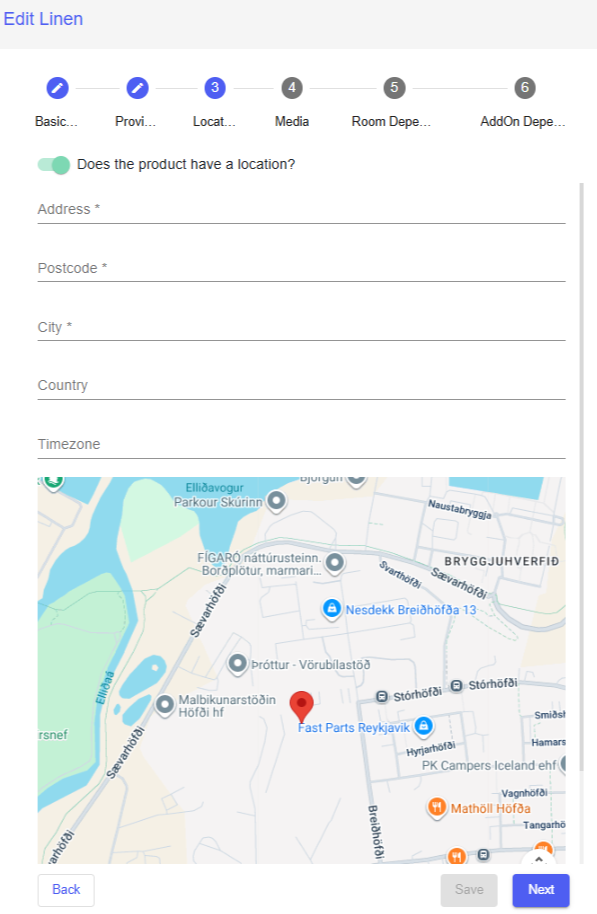
4. Choose whether the product has a separate Location.
-If the product is available at your property, leave the location toggle grey and click Next.
-If the product takes place at another location, turn the toggle on so it becomes green. Then fill in the location information and clik Next.
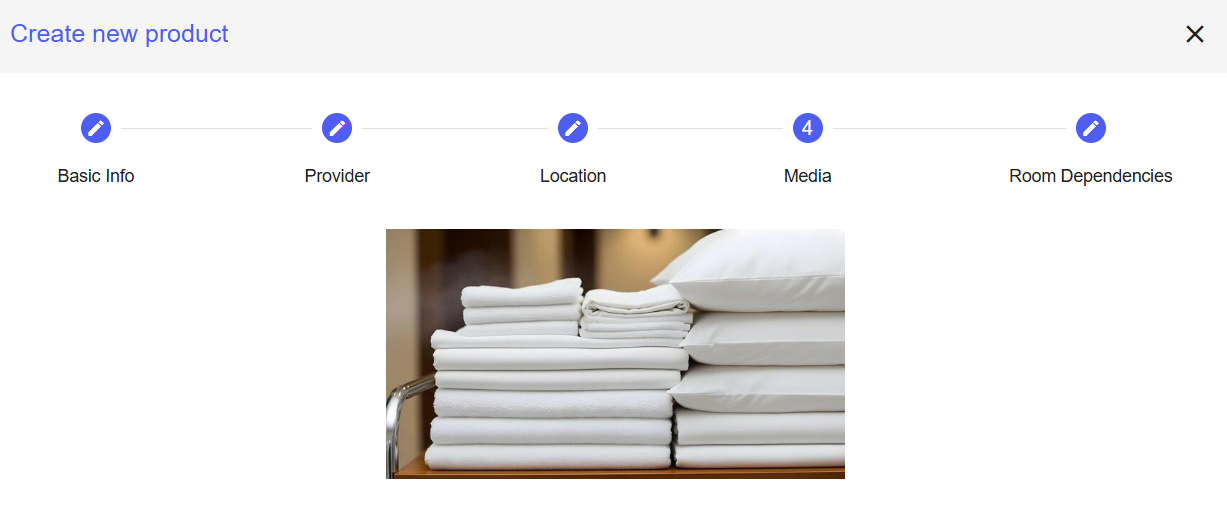
5. Under Media, you can upload an image of the product. This image helps travel agencies understand what the product or service includes.
6. When you have added the image, click Next.
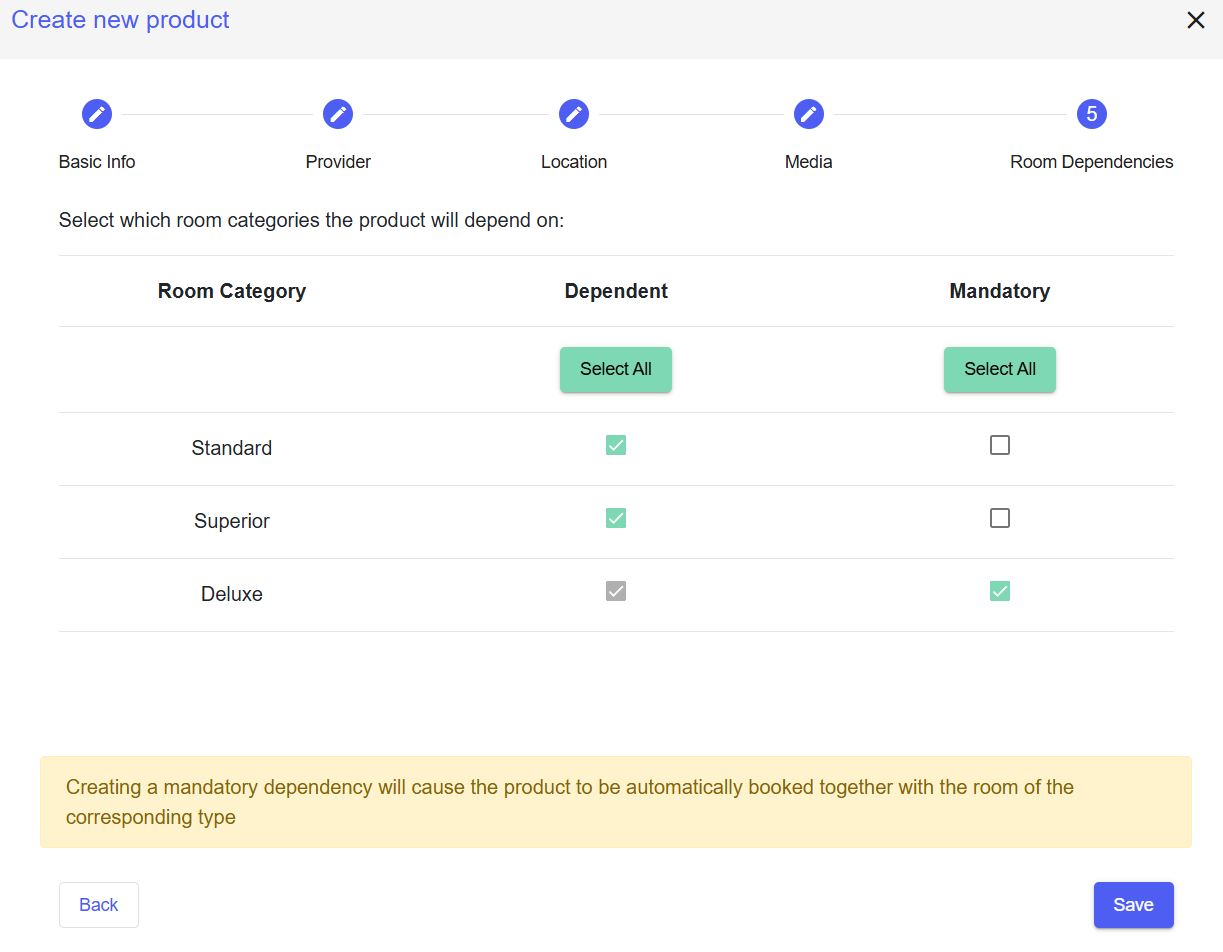
7. Under Room Dependency, choose how the product should be connected to your rooms. The product can be dependent on all or one room category. It can be a mandatory product or if the guest chooses to add products to their trip. The product does not need to be dependent on a room and can be a stand alone product. For example, a cleaning fee can be mandatory and automatically added when a room is booked. A spa access product can be optional or stand-alone.
8. When you have finished setting the dependencies, click Save Dependencies.
After creating the product, you need to activate it before it can be booked. Products must be activated in two places:
-On the room level.
-In the price agreement.
9. Navigate to My Properties and open your property profile.
10. Click Rooms and select the room where you want the product to be bookable.
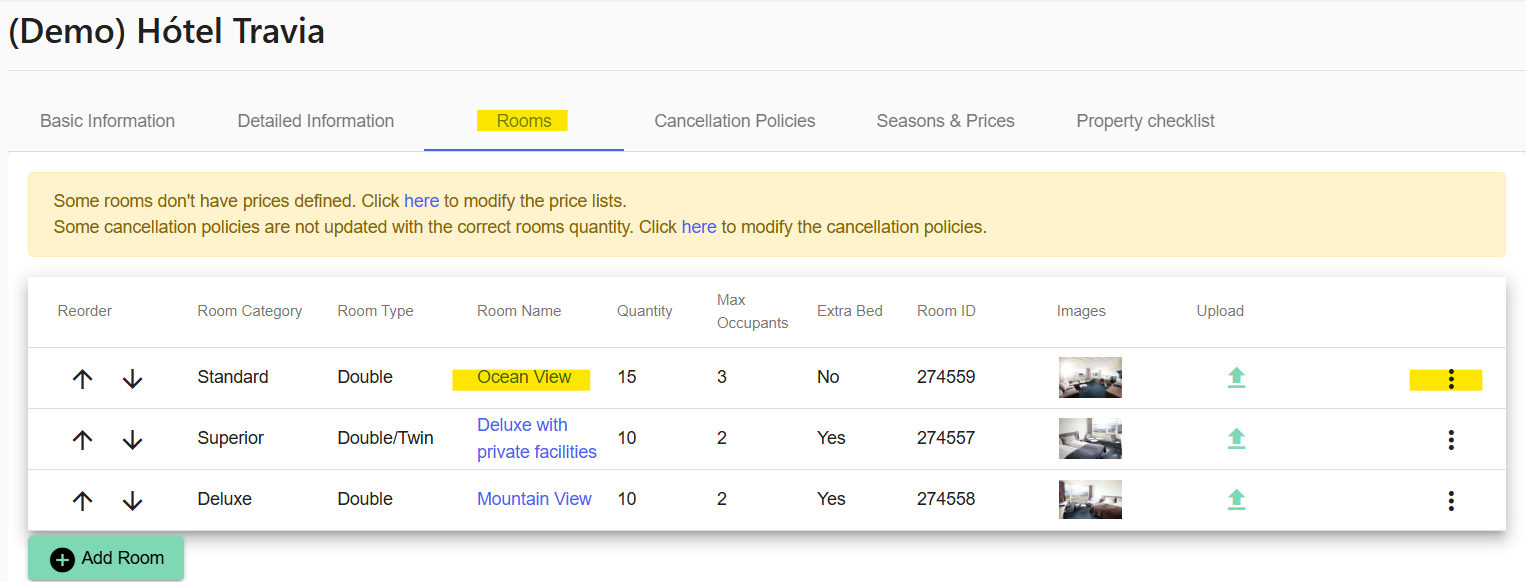
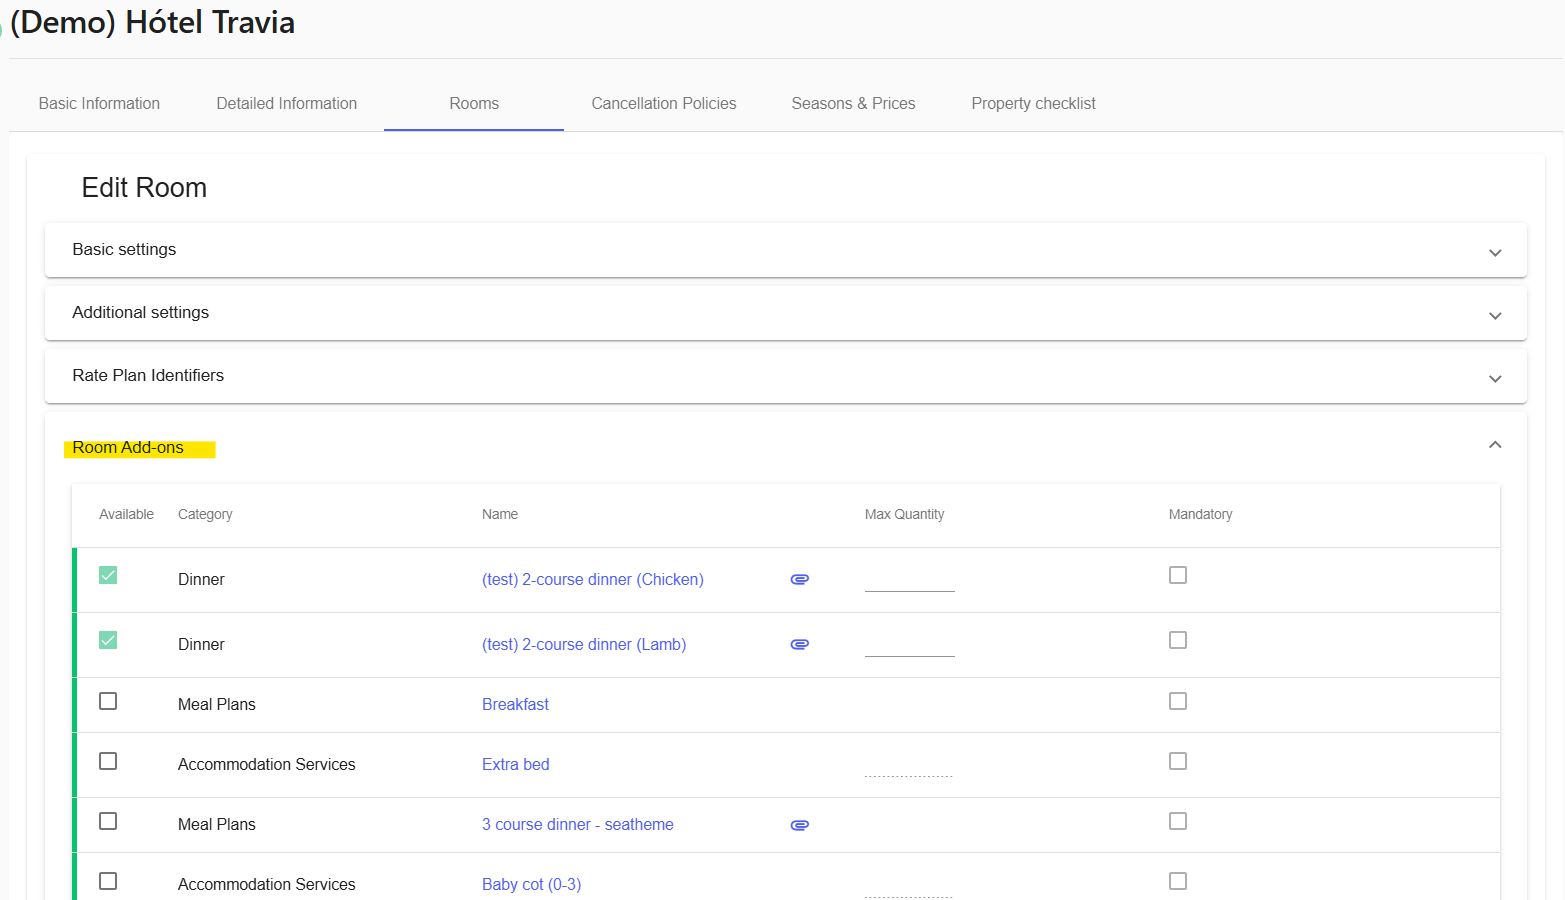
11. Under Room Add-ons, you will see the list of available products.
12. Tick the box for each product that should be available for the room. You also need to enter how many are available for that room type.
The next step is to add the product price in the price agreement.
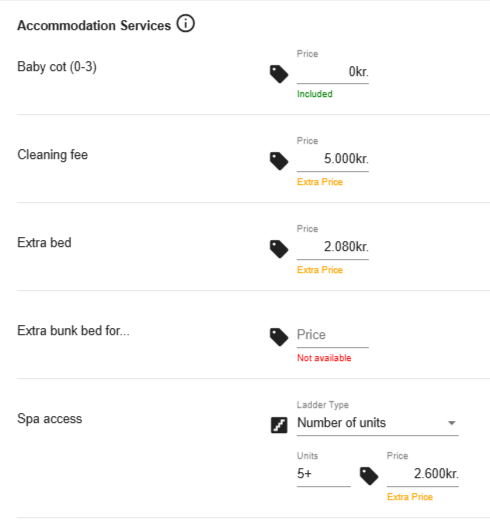
13. Click Seasons & Prices and open the price agreement you want to update.
14. Find the product in the list and add the price.
Once the product is activated on the room level and priced in the price agreement, it can be booked in Travia.
Was this article helpful?
That’s Great!
Thank you for your feedback
Sorry! We couldn't be helpful
Thank you for your feedback
Feedback sent
We appreciate your effort and will try to fix the article